Showing posts with label jewelry. Show all posts

Tuesday, May 25, 2010

Cherry and Raspberry Polymer Clay Tutorial


Supplies:
-Red polymer clay
-Gloss sealer
-Blade

How to Make Cherries and Raspberries!

1. Knead the red clay until soft and roll into a long snake.
2. Using the blade, cut off a riduclous amount of red clay pieces.


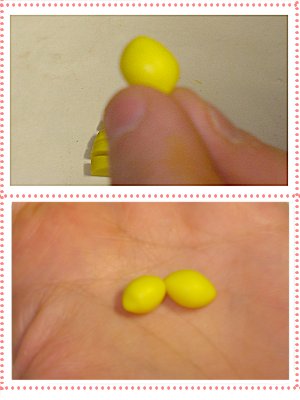
3. Start rolling up all those tiny pieces into cherry balls.


4. Bake as recommended by your polymer clay brand.
5. When your cherries have cooled, use gloss sealer to give them each a nice shine.

TIP: I make lots of crazy small cherries for toppings on various projects.
Painting is always an issue.
Take a small piece of aluminum foil and crinkle up into a snake.
Push sewing head pins up through the bottom in a tidy row.
Remember to leave space between the cherries.
Put a cherry ball on top each pin- do not push through- just enough for them to be secure.
If you bake them this way - let them cool this way also.
Its easier to paint the gloss on and it will give your cherries a tiny stem hole.

Making Polymer Clay Raspberries.

Your supplies are same as cherries.
Follow cherry instructions from 1 -3.
4. Roll a larger red clay ball.
5. If you are going to make a Raspberry charm or pendant, put your eyepin now.
The eyepin will give you something to grasp so that you do not remove your applied texture.
6. Start placing tiny red cherry balls all over the larger ball.

7. Once the larger red ball is completely covered bake according to the directions of your
polymer clay brand.
8. Allow the clay to cool completely before you apply any gloss sealer.

Monday, May 24, 2010

Starlight Mints and Lemon Citrus Canes Tutorial

Supplies:
-Red polymer clay (Yellow for Lemons, Orange for Oranges, Lime green for Limes)
-White polymer clay
-Gloss sealer
-Paint brush
-Pasta Machine or something to evenly flatten clay
-Blade


How to Make a Starlight Mint Cane.

1. Knead your red and white clays.
2. Make a 1/4 inch disc of your red clay.
3. Put your white clay through the pasta machine to get a thin white slab.
4. Turn the red disc on its side on top of the thin whate slab.
Align one side as evenly as possible, Cut the excess white clay away from the width of
the red disc.
5. Remove the red disc from on top the white clay. Cut the red disc in half.
6. Place the cut side face down on top of the white slab.
Trim ends of excess white clay.


7. Sandwich the other half of the red disc together with the red and white pieces.
8. Cut the red and sandwich in half, the other other direction. and repeat Step 4.
Until you have a spoke wheel of red and white.
9. Ok- one more time, get some white clay, give it a quick pass through
the pasta machine on a thin setting.
10. Place the side of your red and white disc on top of the white slab.
Trim away any excess white.
11. Roll the thin white around the wheel, when the ends meet, trim with your blade.
12. Put red through the pasta machine and get a nice thin red slab.
13. Again put your wheel on its side on top of the slab. trim away excess thin red slab.
14. Roll the thin red slab around the wheel. When the ends meet, trim with your blade.

15. Gently push the completed wheel to make sure all its insides are sticking together.
16. Start rolling this wheel into one awesome snake!
17. Oh no! please don't be discouraged if the ends look like a mess.
Cut your ends -the good stuff is hiding in there- I promise!


18. Great! you found the goodies hiding in there.
Now you can start slicing your starlight mints from the cane.
19. Bake according to you clay brand's directions.
20. Allow the clay to cool - paint with gloss.

Tip: This cane takes a little bit of practice. But hang in there.
Canes will come to be an important part of making polymer clay embellishments.
Try using some oddball clay leftovers for interesting color schemes.
Opalescent glitter looks AMAZING on this pattern too!

Whole Lemons Polymer Clay Tutorial

Supplies:
-Yellow polymer clay
-Toothbrush
-Blade

How to Make Whole Lemons:

1. Knead your favorite yellow clay until soft.
2. Roll clay into a snake.

3. Slice even sections of the clay snake.
4. Roll each section of yellow clay into a small oval shape.

5. Pinch one end of the clay to make a nub.
6. Give opposite end a more rounded bottom.
7. If you are going to make a Lemon charm or pendant, put your eyepin now.
The eyepin will give you something to grasp so that you do not remove your applied texture.


8. Using your toothbrush, gently stipple the texture all over the lemons.
9. Bake according to your polymer clay brand's directions

Pineapple Slices Polymer Clay Tutorial

Supplies:
-Yellow polymer clay
-Translucent polymer clay
-Gloss sealer
-Paint brush
-Icing piping tip
-Pasta Machine or something to evenly flatten clay
-Blade

Let's Make Pineapple Slices and Wedges!

1. Mix your yellow and translucent clay.


2. Give that ball of yellow a good roll or two and run it through
your pasta machine.
3. Run it through the pasta machine until your yellow is about 1/4 inch thick.
4. Using your Icing piping tip like a thimble press into the yellow slab,
cut right to the bottom.


5. Weed away from the pressed circles the excess clay.
6. Flip the piping tip over and press the small end into the center of your
yellow circle all the way through.


7. If you are going to make a Pineapple charm or pendant, put your eyepin now.
The eyepin will give you something to grasp so that you do not remove your
applied texture.
8. Using your blade gently press indentations to make the texture of a sliced
pineapple.
9. Repeat making the indentation on the back side of slice.


10. Bake according to the directions of your clay.
11. When your clay has cooled off, paint the gloss sealer all over the pineapple
slices so they look juicy.
12. Once your gloss sealer is dry, cut your slices into tiny wedges.

13. Done!